
Disclosure: Content linked in this article may be affiliate links. All that means is that I may earn a few pennies if you use the link and make a purchase – it helps me keep this site up 🙂 This post is not sponsored directly by these companies and only contains products that we genuinely love and recommend for any keyboard enthusiast. So thanks in advance if you choose to click!
One of the most intimidating things when getting into the custom mechanical keyboard hobby is learning to solder (for us non-electrical background folks, anyway). You got everything you need… now you just need to put it all together.
For many keebnerds, soldering is all the fun of building your custom keyboard but at the same time it can be a very frustrating process (especially if you haven’t soldered anything before). When I started out, I resoldered entire boards, ruined PCBs, and wasted a ton of materials since I didn’t have a resource or a way to learn. Hopefully this guide will help prevent some of that headache and waste.
This guide is specifically for soldering mechanical keyboard switches to a PCB but if you stumbled upon my site from Google or anywhere else, these same techniques apply to any basic through-hole soldering (also, WELCOME!).
If you are only looking for soldering tool recommendations please feel free to read my review for some suggestions: Best Soldering Equipment for Building Your Mechanical Keyboard.
Disclosure: There are like, so many links on this page to some really awesome stuff; let’s talk about them. Some of these links are affiliate links which means that if you click on them and buy something, The Keeblog may earn an itty bitty commission at no extra cost to you. That being said, you can rest assured that The Keeblog will never ever recommend something that is either untested or known to have issues. I’ll only recommend what, in my opinion, is good stuff. So thanks in advance if you choose to click!
Safety First!
You will be working with a HOT iron and MOLTEN tin soldering wire. It is important to take necessary precautions to ensure your safety. No one wants to look like a dork, but I recommend wearing something to protect your eyes and cover your face from the fumes. When soldering, it is always recommended to take the following safety precautions:
- Solder in a well-ventilated area. I highly recommend using lead free solder if your workspace doesn’t have much air flow. Solder wire that is leaded is often 60-40 (that is 60% tin and 40% lead).
- Wear safety equipment: Goggles/glasses, gloves, long sleeves.
- Keep your workstation clean and uncluttered.
- Get a soldering iron stand. Here’s a good one available now on Amazon that includes a tip cleaner:
It is also important to keep your PCB safe from static. Specifically in colder weather and/or when there is less humidity in the air static can become a risk as it could damage your PCB. I have personally experienced the horror of destroying a Clueboard PCB and permanently damaged the on-board LED (sliding around my carpet-flooring like a fool). You can prevent static by grounding yourself with a rubber grounding mat.
What You Will Need to Solder a Mechanical Keyboard
As mentioned in the intro, I have previously written a review on some great buys if you do not yet own any soldering equipment. You can see the recommendations here. Here’s what you will need to get started:
- PCB/Keyboard Kit
- Switches (It is universally agreed upon that Switches Matter)
- Solder Wire
- Soldering Iron or soldering station
- Desoldering Pump and/or Copper Wick
- Optional: Rubber grounding mat
Choosing the right soldering wire for keyboards
You also might notice that there are soldering wire coils of different diameters- 0.8mm is usually thin enough but you can get thinner wires such as this 0.6mm solder if you want extra fine solder. Certainly not a bad idea when you consider how tiny some of the components are. I’d also recommend going with lead free solder to avoid fumes while spending time soldering switches.
Best lead free solder for keyboard soldering:
Leaded solder if your keyboard making area has good ventilation
Check out my recommendations for switch soldering equipment.
Soldering starter kits:
Here’s a popular soldering iron starting kit that has pretty much everything you need to start soldering keyboard pcbs and switches:
A handy higher budget option that could help with ease of soldering and workflow:
Desoldering tool for removing solder and desoldering switches from your keyboard (Pump and/or Copper Wick)
- Optional: Rubber grounding Mat
If you are not sure what soldering equipment to purchase, please see my recommendations!
Switches can be purchased from many different vendors including Amazon and specialty sites like NovelKeys. If you are looking for something a bit on the fancy side, ZealPC is well known in the hobby to have the best switches (and they have something for everyone!).

Why are Good Soldering Techniques Important?
First and foremost, keeping your PCB neat and clean prevents electronic failures such as shorts that could potentially damage your keyboard. Short circuits can potentially permanently damage your PCB so you will want to take extra care in making sure there are no stray blobs of solder wire or excess flux and that the board is as clean as possible.
If there is a messy soldering job and a short occurs the damage can range anywhere from permanently damaged LEDs (PCB mounted ones LEDs hard to replace!) and key inputs that become permanently unresponsive (It’s rlly hd to understand you whn your kys don’t typ).
Another benefit to having good soldering habits when working on a custom mechanical keyboard is that clean soldering makes it easier to resell your board when you are looking to sell or trade your keyboard in the community (places like Reddit’s r/mechmarket). People prefer to have a cleaner PCB to work with and it is very common that the new owner will want to replace the switches to their preference.
Yes, switches matter. Here’s an in-depth article on switches if you are interested in finding your preference: Switches Matter
What is the right temperature for soldering switches? How do I avoid melting my keyboard?
My cool tip would be to make sure the soldering iron you have is in good working condition and can get hot enough to melt your solder. For example there is a melting point of 422.6°F/217°C for this lead free solder vs 361°F/183°C for leaded solders that are about 40% lead.
However if you have a soldering iron or station with a bit of power and has a temperature control then it’s advisable to just heat it up to the melting point of the solder- if you turn it up too high you can risk melting components. For example, my soldering station has a maximum temperature of 842°F/450°C and I would not want to wave that light sabre anywhere near my pcbs. You most likely won’t need to go over 422.6°F/217°C unless you’ve found yourself some real whiz-bang platinum solder wire or something. As great as switches are those itty bitty guys aren’t really designed for volcanic heat!
Soldering Basics
Soldering is admittedly a simple task though it can feel monotonous. It is important to stay focused when you are working with a bare PCB because, as mentioned before, you will be working with a HOT iron and MOLTEN tin soldering wire. It is crucial to take safety precautions not only to prevent injuring yourself but also to prevent damaging the keyboard kit that you bought with your hard-earned money.
First, you will want to clear your work area. It is best to have a clear working area of at least 1’ x 2’ to make sure you have plenty of working space.
Make sure you have ALL of your parts ready. The last thing you want is to leave a hot soldering iron running while you run through your supply box for more. Never leave a hot iron unattended!
You may attach all of the switches to the circuit board first prior to soldering if the switches are PCB mounted and the PCB supports this. PCB mounted switches will have additional plastic feet that can be mounted directly on the compatible PCB for more stability. Not all PCB’s and and switches support this.
Most custom mechanical keyboard kits use a plate mounted switch system for better alignment. You may also attach switches to the plate first and lay the PCB over the switch leads, making sure all copper leads are visible through the through-holes on the PCB. Don’t worry if some switches fall off the plate! Not all plates have a snug fit and it is possible that some will fall out before soldering. As you work across the board and secure the switches, you should see more stability.
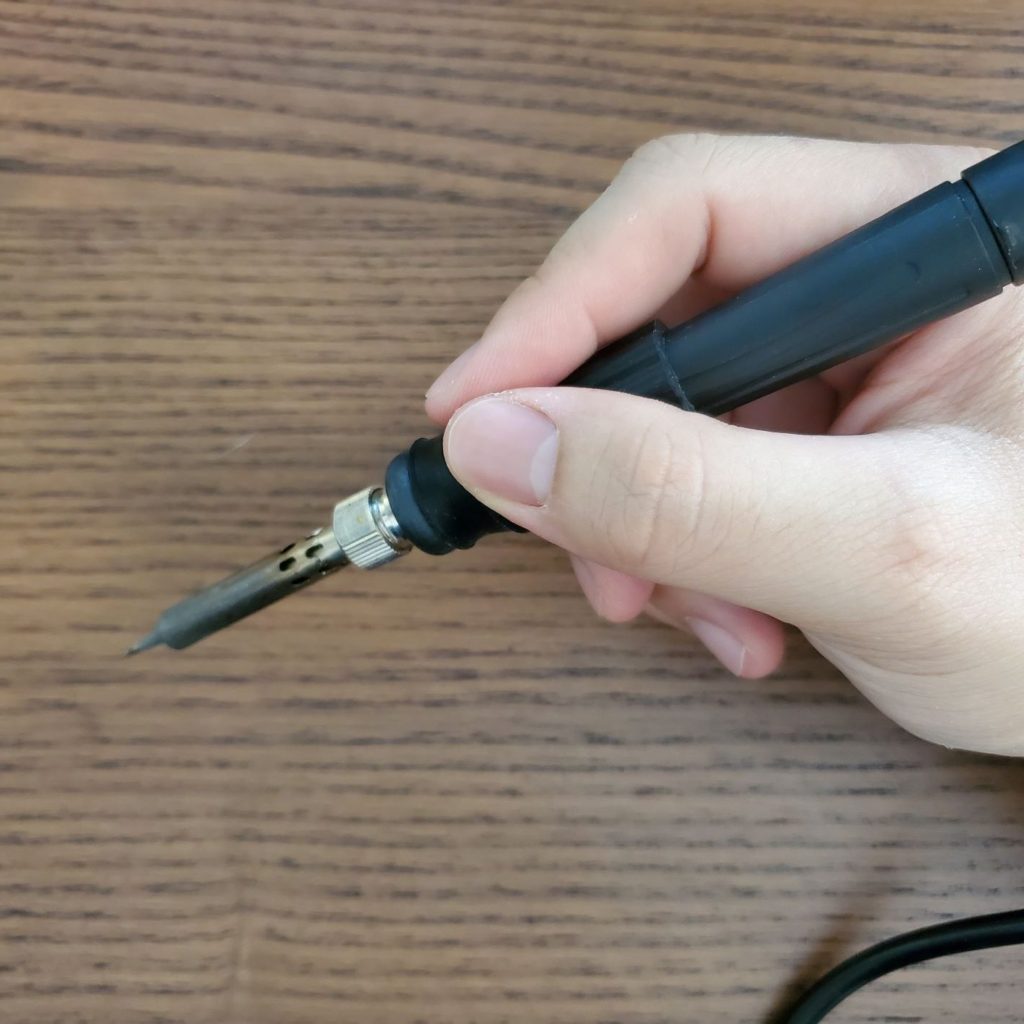
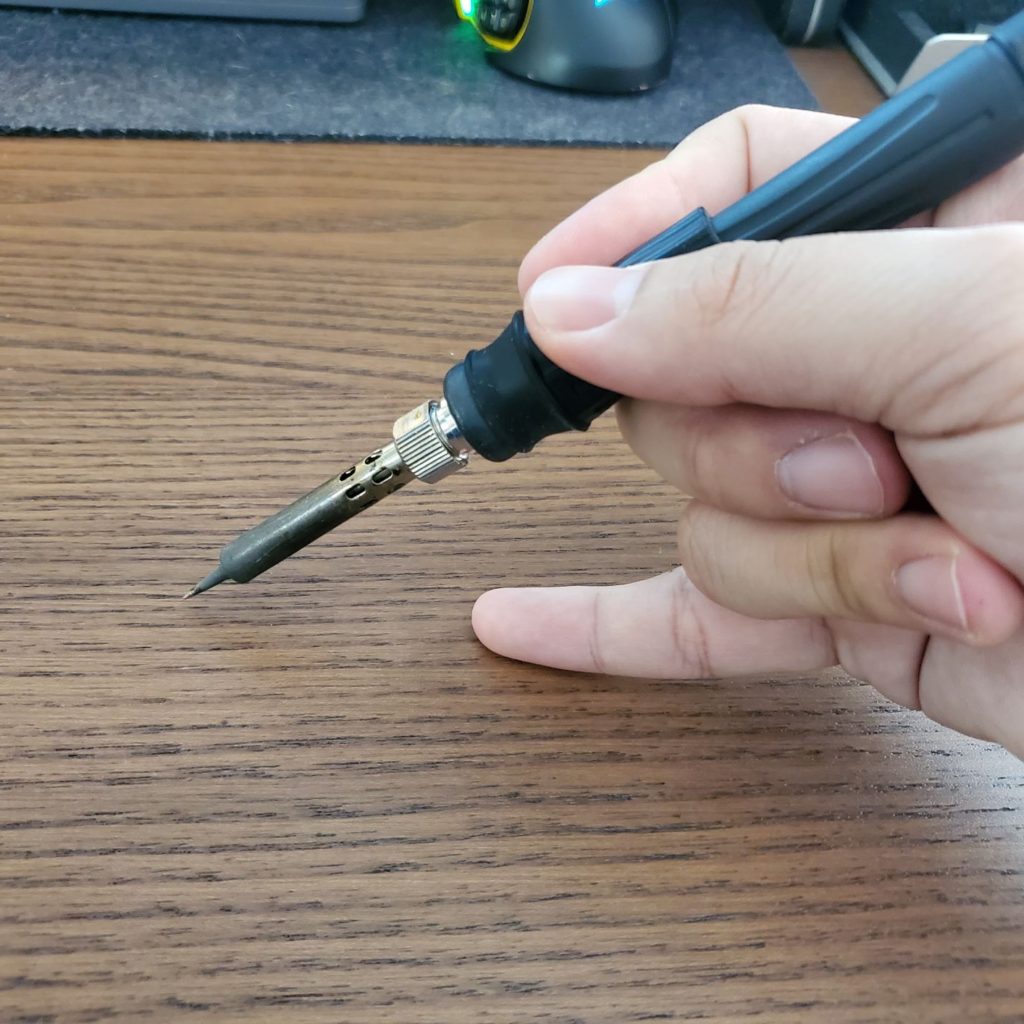
How to properly grip your soldering iron and wire.
You will want to hold your soldering iron like a pen to keep it steady. If your hands are shaky like mine, you can try using you pinky as an anchor as pictured below on the right. Though it using the pinky anchor is not the most comfortable, it is sturdier and I find myself switching to this grip in areas where a bit more finnesse is needed. Typically, it is best to hold the soldering iron on the dominant hand. Although it might seem obvious, it is key to remember that the soldering iron heats and guides the metal. It does not release any metal. Keeping this in mind may help you adjust to the different motions you will be performing while holding a pen grip as it may take some getting used to.
Your other hand should hold the soldering wire as shown below. This wire will melt as you feed it against the solder iron and into the through-hole on the circuit board. It is always safer to keep a good distance between your fingertips and the hot iron. How you grip the solder wire may also depend on whether you purchase a tube or roll of solder wire. Here’s an excerpt from this article:
“…(Solder wire purchased in tubes) can be held like a pen and there is a hole on the tip of the tube where you can feed the solder wire through. This allows for more stability and keeps your fingertips further away from the hot iron. “

All together now…

Soldering switches to your mechanical keyboard PCB
Now that you know the proper and safe way to hold your equipment, this section will teach you how to actually solder your switches onto the PCB. To summarize each step, the actual soldering consists of heating up, feeding wire, and moving to the next switch. You will find that you can get into a “rhythm” once you begin.
After every 5 or so switches OR when you see your solder tip begin to oxidize, it is necessary to clean your solder tip. You can either use a damp sponge that is typically included in soldering kits or a brass wire sponge cleaner. I recommend using the brass wire cleaners as they are much easier to use and clean up after the soldering job is complete. Properly maintaining your solder iron tips not only ensures that they last longer but is also a safety measure as heavily oxidized solder tips distribute heat unevenly.

The ideal amount of soldering wire should leave a small “volcano” or “mountain” shape around the switch/component’s lead. A well-soldered through hole will have no visible space between the hole and the lead. Here is a poorly-drawn-but-an-effort-was-made picture for comparison:

Post-solder Clean Up
The last and most often neglected step in the soldering process is cleaning the board of any residual flux. If you are using the right soldering wire (non-leaded), there will undoubtedly be flux residue around your finished solder through-holes. These small “pools” of flux are not inherently harmful and won’t prevent you from using the board but excessive amounts can damage your PCB components over time. For this reason, it is best practice to remove any residue with a damp cotton swab or sponge as most flux is water soluble. Naturally, you will want to make sure everything is dry before you put the rest of your keyboard together and plug it in.
Excess flux residue won’t have a noticeable impact but will minimize any possible shorts in the long run. It’s also nice to know that everything “under the hood” looks just as great as it does on the outside.
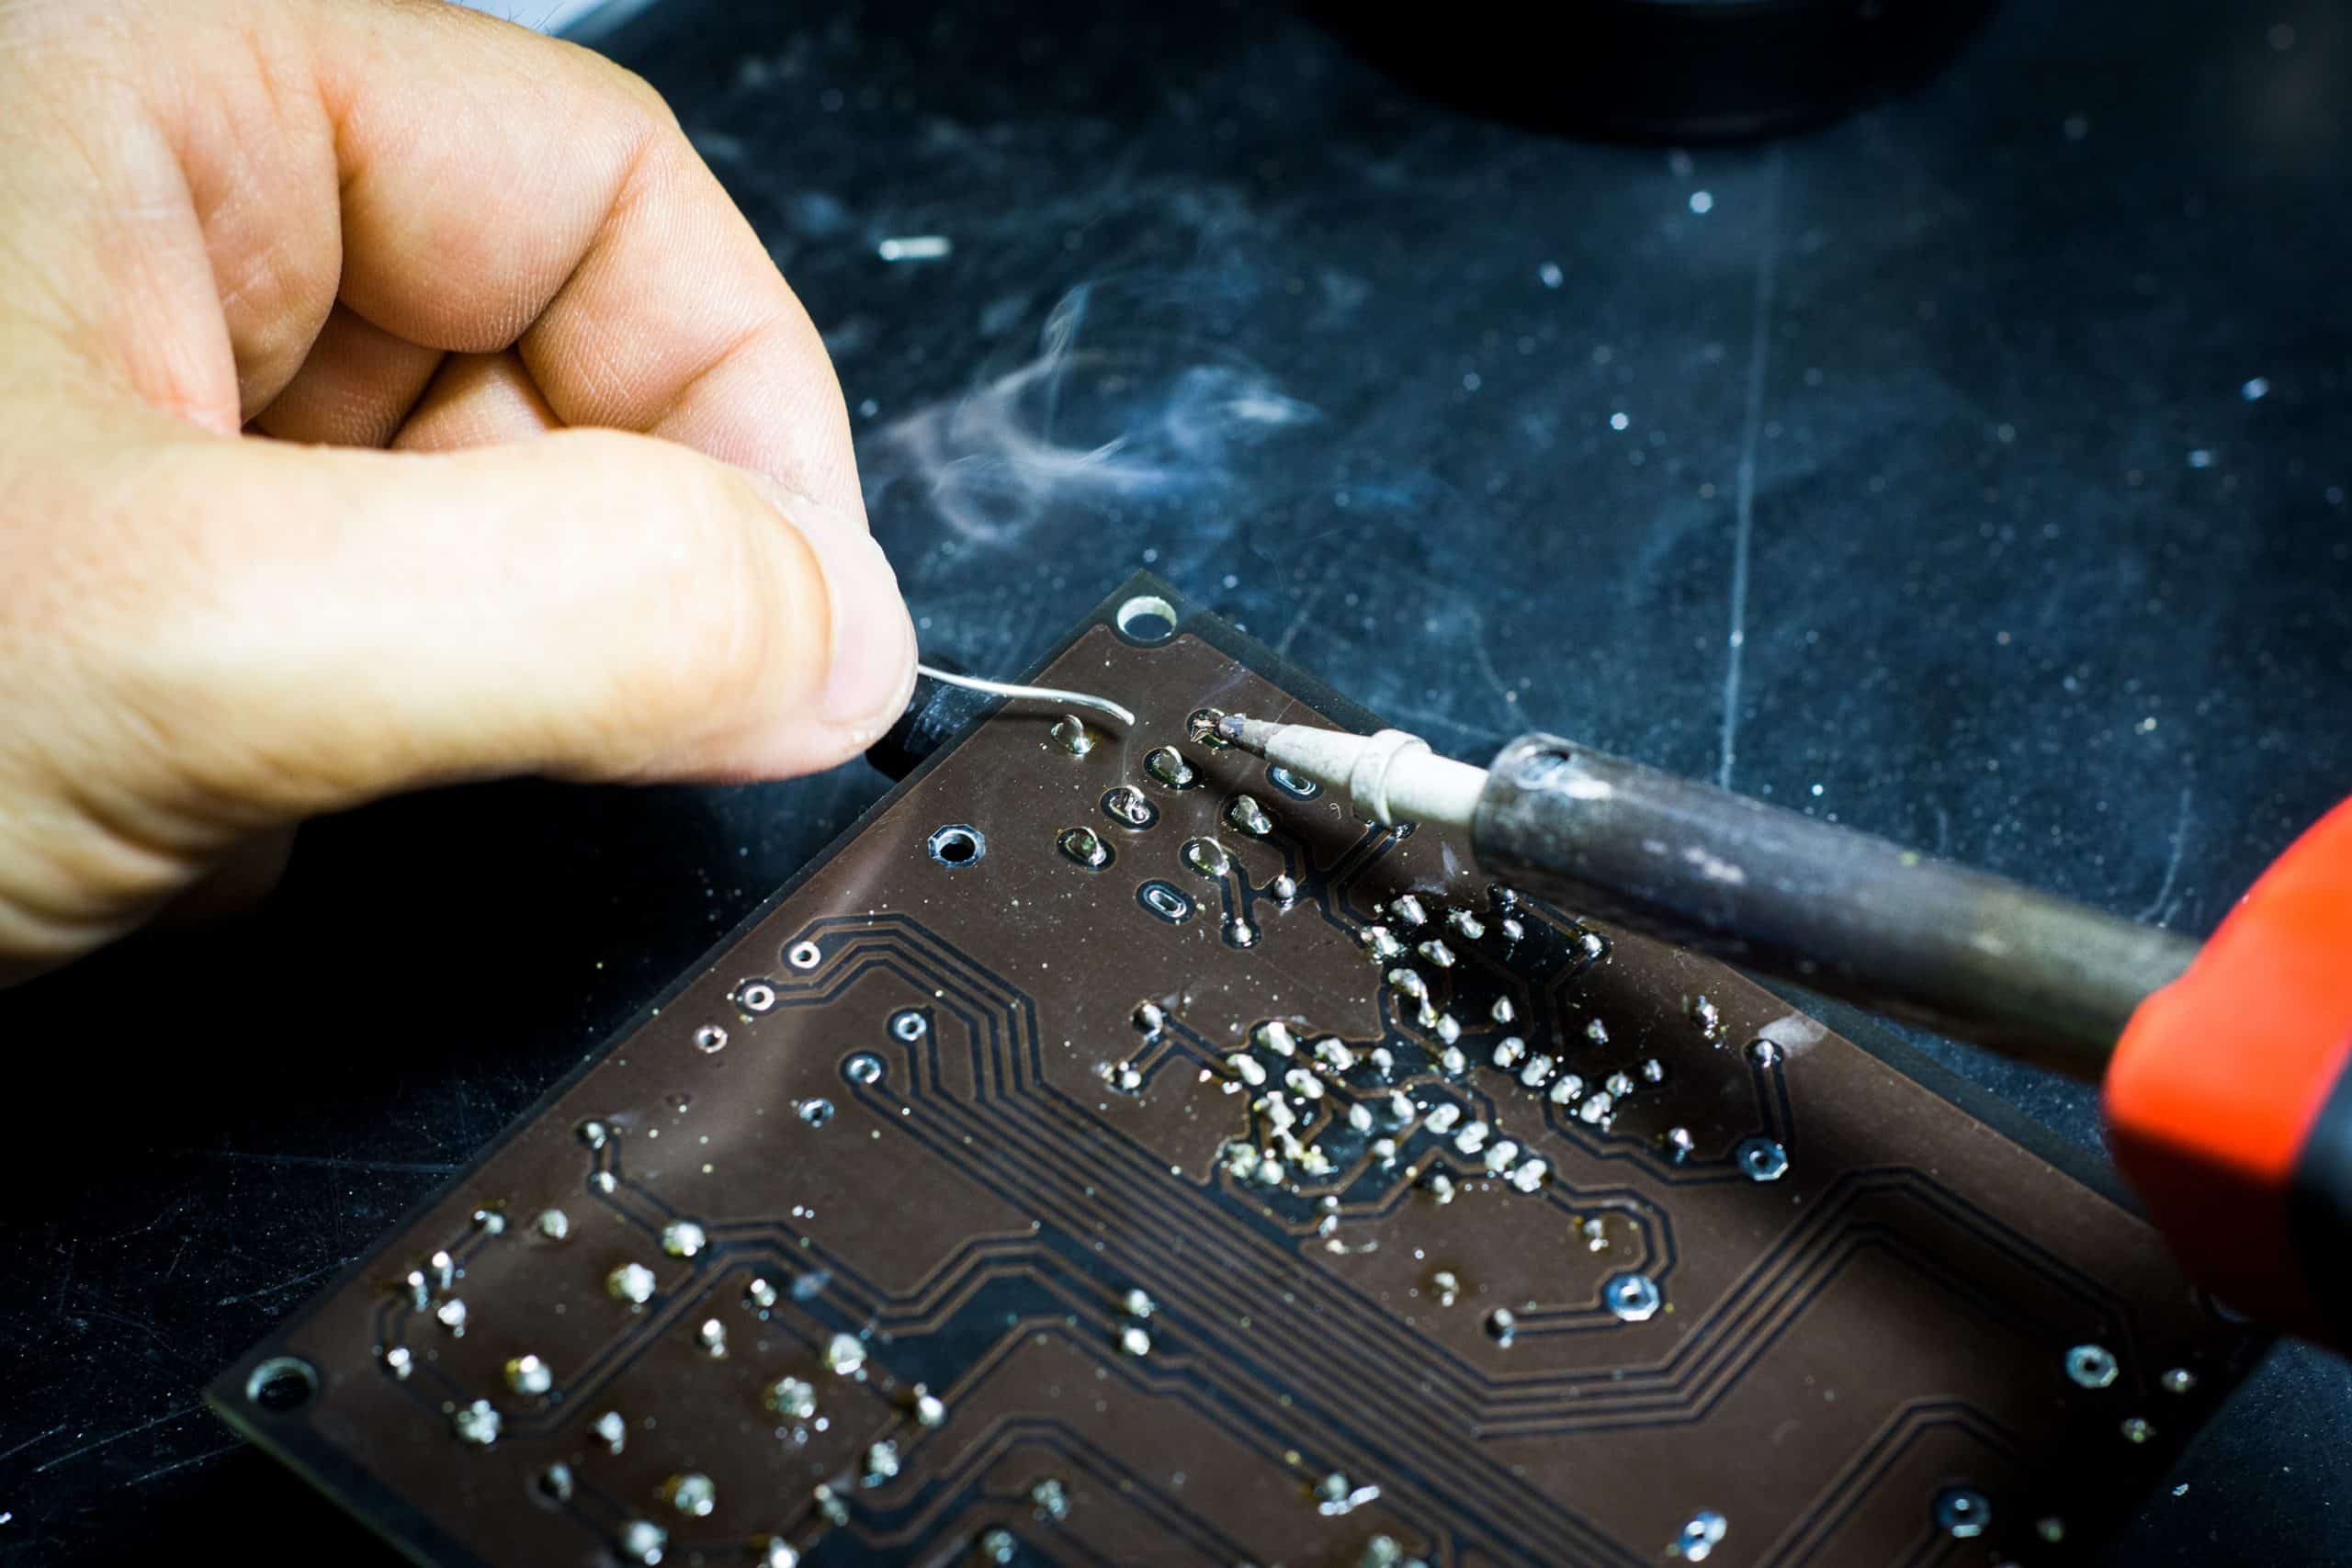
Here is an example of a PCB with a lot of residual flux that could use some cleaning:

Desoldering
Desoldering is also an extremely useful skill to have in the custom mechanical keyboard hobby. Usually if you trade or purchase a keyboard second-hand, the previous owner will have already installed their own switches onto the board. Mechanical keyboard switches are one of the primary customization options of a keyboard and weigh heavily on the personal preference of the user. Because of this, it is very common for hobbyists to want to desolder the previous owner’s switches and replace them with their own.
This task can be even more monotonous and frustrating than soldering unless you have the right tools and/or technique. There are many methods to desoldering with some more destructive and some more efficient than others. I will only go over the methods that will best preserve your components because custom PCB’s and switches can get pricey and you will want to salvage them whenever possible.
Using a Desoldering Gun to Remove Solder: Recommended!
By far, using a desoldering gun is the most efficient and cleanest method of removing solder from your mechanical keyboard PCB (or any circuit board!). The biggest reason why most custom mech enthusiasts do not use a desoldering gun is due to the price as they can be very expensive. Do to the high price tag, it usually isn’t worth purchasing unless you plan on getting deep into the hobby and modifying, buying, and selling a lot of keyboards.
The operation of a desoldering gun is simple: power on, heat, and suction. Similar to a soldeing iron, there is a heating element that melts the solder on the through-hole of the PCB. Once melted, you just simply need to press the trigger to enable the suction and move the tip of the desoldering gun to extract the molten solder.
It is also good to supplement the clean up job with some copper wick. The following section will show how copper wick is used to remove solder with a wick. Understand that this can also be done using the desoldering gun’s heating element if there is any tough residual solder.
Using Copper Wick to Remove Solder
Copper solder wick is also a great way to desolder a keyboard. Before purchasing my desoldering gun, I used to use copper wick exclusively for quick desoldering jobs. When applied correctly, using copper wick only can yield the cleanest results when desoldering switches and componenets from any PCB. The proper technique is a bit difficult to put into words so I will leave it to this great YouTube video created by Scott Hill:
I would recommend keeping a pair of wire cutters close by to clip off the used wick. Here are some links to what I use and always keep closeby:
Desoldering Pump a.k.a. Solder Sucker
The simplest and most frustrating method of desoldering… but still effective. Soldering starter kits often come with a desoldering pump which uses spring loaded suction to quickly pull off heated solder. While the operation is simple, it can get frustrating if you do not activate the plunger quick enough and the solder has already cooled enough to stay in the through-hole.
The process of using a solder sucker to remove solder from a PCB is simple but if you are planning on removing all of the switches from a mechanical keyboard, be prepared to spend a good chunk of time doing it. It may be worthwhile if you are on a budget and can be used in conjunction with copper solder wick.
The only time I choose to use a desoldering pump over other tools is if I really don’t care to salvage the PCB and only want to keep the components. A good example of this is when you have a malfunctioning PCB but amazing ZealPC mechanical switches that are very worth salvaging. You can quickly use a desoldering pump to remove enough solder to keep your switches.
Last update on 2026-04-25 / Affiliate links / Images from Amazon Product Advertising API
Discover more from The Keeblog
Subscribe to get the latest posts sent to your email.