

Disclosure: Content linked in this article may be affiliate links. All that means is that I may earn a few pennies if you use the link and make a purchase – it helps me keep this site up 🙂 This post is not sponsored directly by these companies and only contains products that we genuinely love and recommend for any keyboard enthusiast. So thanks in advance if you choose to click!
Disclosure: There are like, so many links on this page to some really awesome stuff; let’s talk about them. Some of these links are affiliate links which means that if you click on them and buy something, The Keeblog may earn an itty bitty commission at no extra cost to you. That being said, you can rest assured that The Keeblog will never ever recommend something that is either untested or known to have issues. I’ll only recommend what, in my opinion, is good stuff. So thanks in advance if you choose to click!
Back on the very first episode of What’s On My Desk? I showed off my generic cable that was tied into a monkey fist knot. I have seen a similar cable before as an advertisement on Instagram but it was pricey and I quickly forgot the brand and never saw it again. Just a few weeks later, it hit me: I really really wanted a monkey fist cable.
Especially for a tabletop USB-Hub set up like mine, long cables become a bit of a hassle and just look plain messy. But we are in the custom mechanical keyboard hobby. We LOVE extra. Is the solution as simple as buying a shorter cable? No way. If I would just buy a shorter cable, I would just buy a $15 rubber dome keyboard off Amazon.
So now that we know that making a monkey fist cable is entirely justified and totally not unnecessary, as a wise man once said, “Let’s get down to business” -General Li Shang, Mulan.
This tutorial will show you how to tie a monkey fist knot that will be the same size and length as the one featured in What’s On My Desk? Ep. 1. You can definitely use a longer cable or different size ball bearing to your preference. If all goes well and you follow my tutorial, you should end up with a monkey fist cable that is about 4 cm (1.6 in) in diameter with a little over 25 cm (10 in) of loose cable to have on either end.
Disclosure: There are like, so many links on this page to some really awesome stuff; let’s talk about them. Some of these links are affiliate links which means that if you click on them and buy something, The Keeblog may earn an itty bitty commission at no extra cost to you. That being said, you can rest assured that The Keeblog will never ever recommend something that is either untested or known to have issues. I’ll only recommend what, in my opinion, is good stuff. So thanks in advance if you choose to click!
Ingredients:
1x 6 ft cable
1x 1″ Chrome Steel Bearing Balls (Comes in a 3 pack)
2x Human Hands (opposeable thumbs recommended)
“Don’t be a jerk” Disclosure:
Please keep your custom cable on your desk and understand that this tutorial is to create this custom cable for purely ornamental/decorative purposes. Don’t carry it around. Don’t wave it around. Be civilized and don’t smack people with it. That’s illegal and it’s also just plain mean.
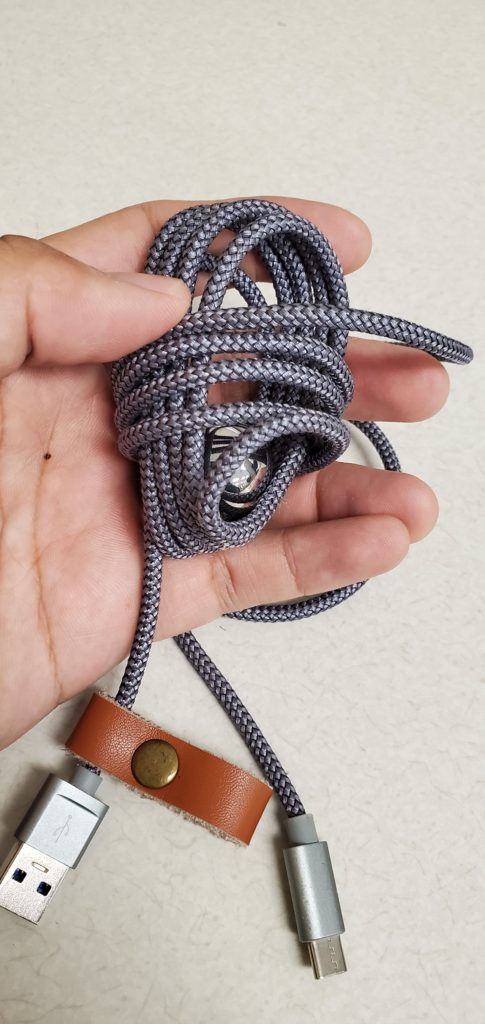
Step 1: Firmly Grasp It In Your Hand


Getting the knot started is really all about the grip. You can use the ball bearing as something to make your first loops around but I have found that it is easier to wrap the cable around my hand first and worrying about the ball bearing later.
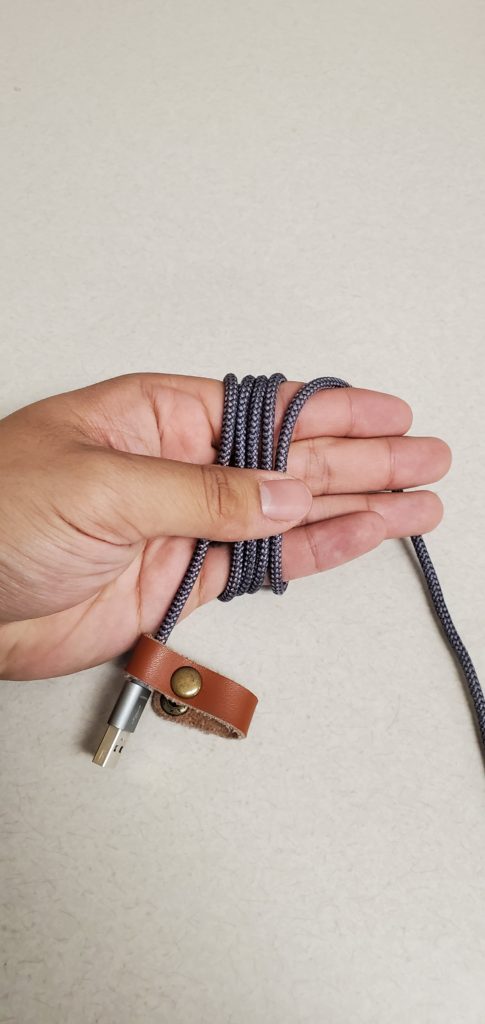

There is no need to worry about the loops being too big since they can always be tightened later on; I would actually recommend leaving a generous amount of room since the first set of loops will need to leave enough space for the ball and 2 more sets of loops.
IMPORTANT: Note that the wraps start close to the USB-A end. It’s important to start on this end because you will need to pass through the USB-C end through the loop.
For my monkey fist cable, I used 5 loops. There will be 3 sets of five loops so it is very important to leave extra space in your first set because you will need to be able to pass through the cable head on the final set.
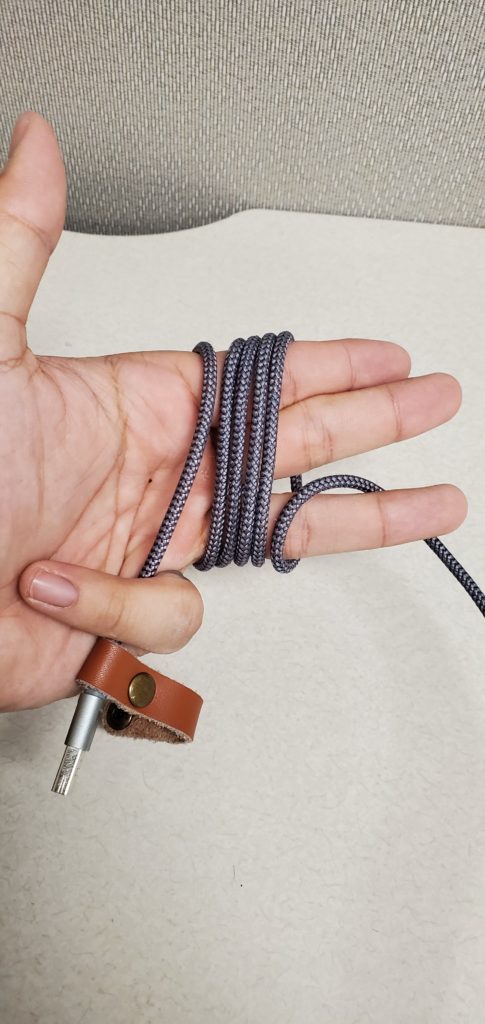
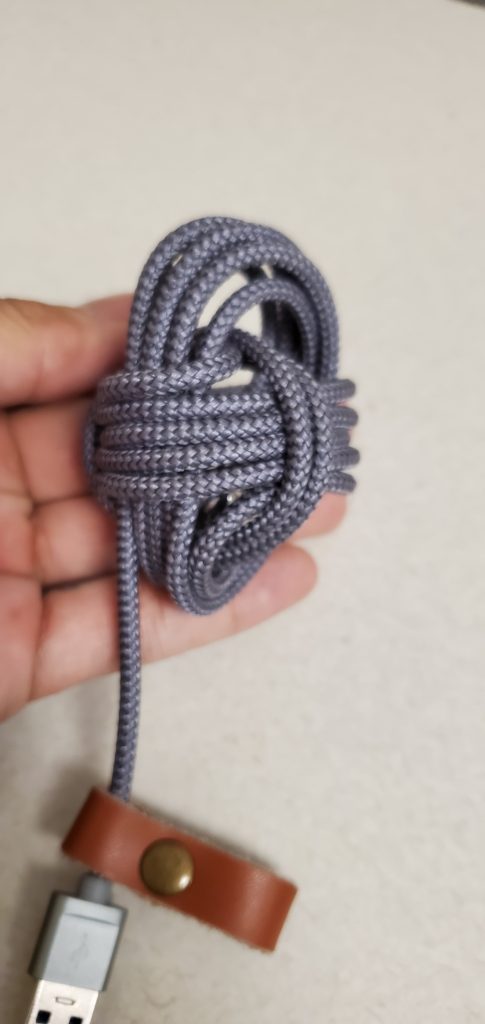
Step 2: “Horizontal” Loops
This step is even trickier and can become frustrating if you don’t grip everything properly. Just be sure to hold the the knot carefully as shown below so that it does not unravel. When you begin wrapping the second set of loops you will get this ugly mess but don’t worry! Things will start to look a bit better on Step 3 when you have the ball bearing as an anchor. Keep your chin up keebro.
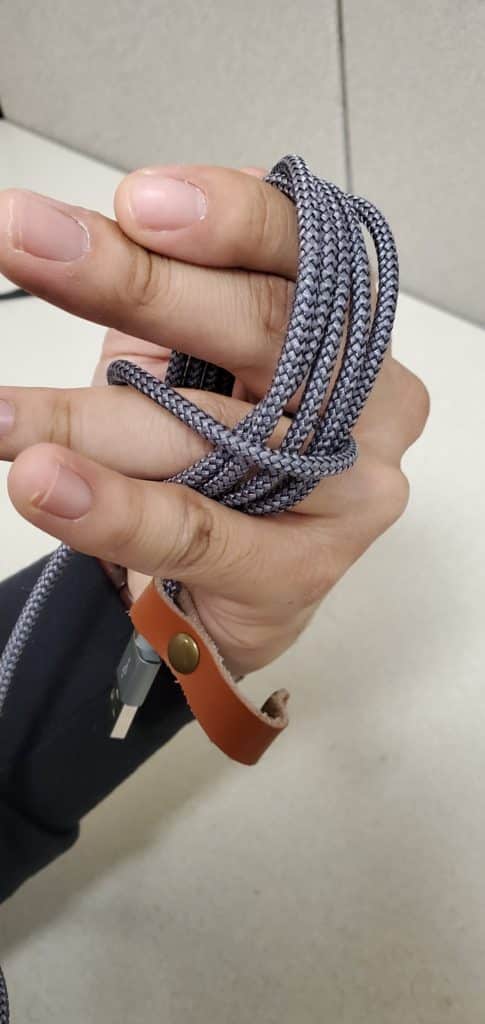

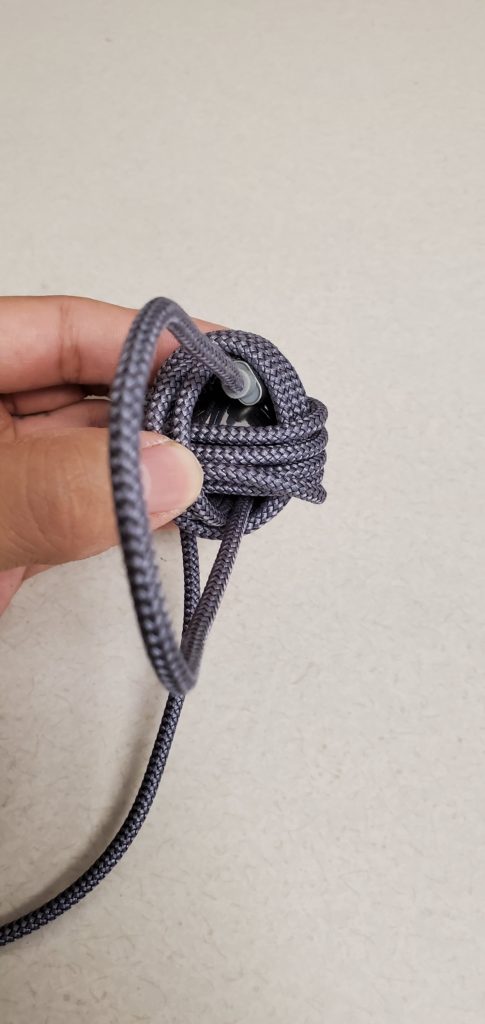
Step 3: The Last Set. Enter Metal Ball.
If you left yourself a good amount of wiggle room in step one, this step will be much easier. You’ll want to drop the ball in between your two loop groops as an anchor that will help you tie the third and final group together.
You can create the loops as you did in steps 1 and 2 but this time around, you will need to thread the cable head through the set of loops you created in Step 1. This is where it become apparent that using the USB-C / Micro / Mini becomes important. If you started with the USB-A (Standard) connector on the long end… it’s not too late to start over. We’ll leave it at that. The smaller end will be much easier to pass through the first loop group.
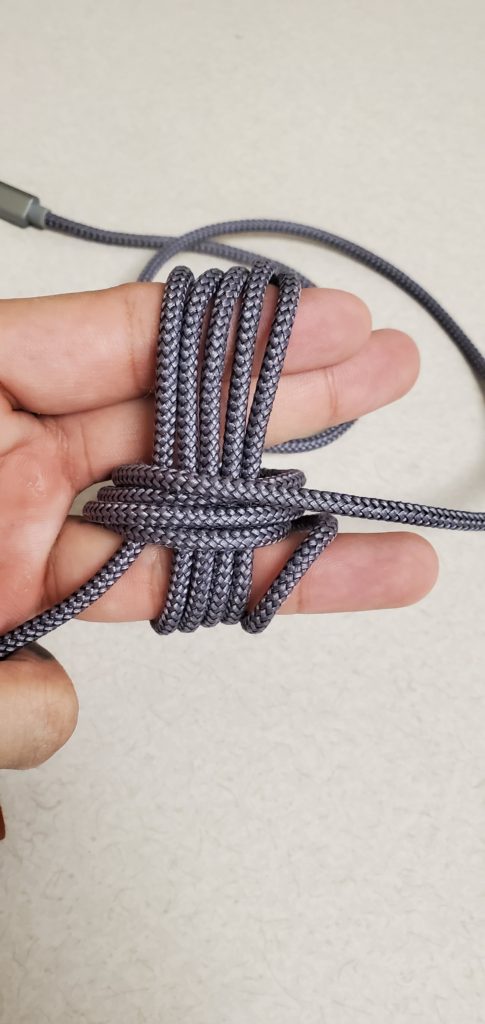
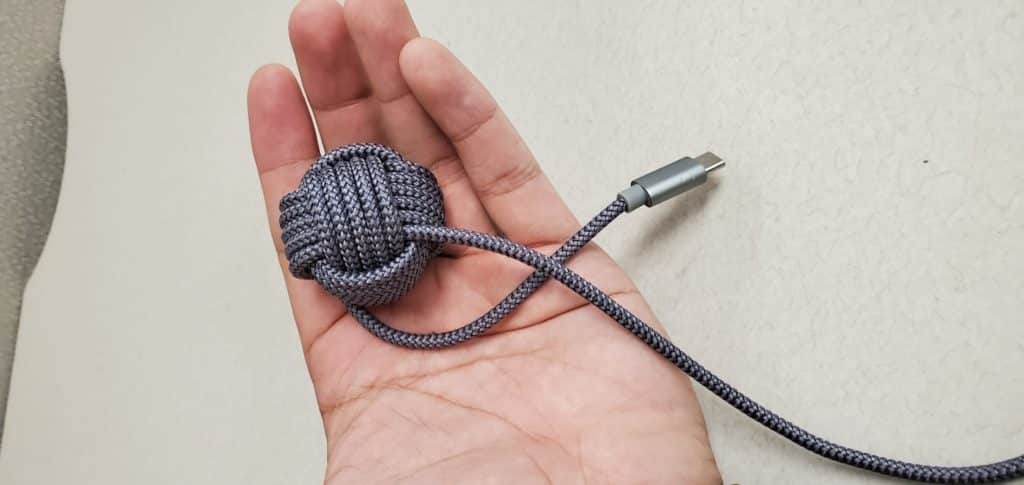
Step 4: Adjusting
Now that you have your monkey fist knot, you can adjust the length from each end as you please and also use the same method to tighten each individual loop for a neater look. I personally like to have the monkey fist closer to my keyboard so the length between the monkey fist and the port is much shorter.
You can accomplish this by “feeding” the length individually through each loop and pulling the other end all around the knot. This can get time consuming if you want the perfect monkey fist. After tightening everything, you should end up with a glorious monkey fist knot (that you should keep on your desk and know swing around or smack people with. See “Don’t Be a Jerk” Disclosure)
Please let me know if you have any further questions! I can always clarify and improve these instructions if there is anything that is unclear. If you want to see more DIY tutorials like this, please subscribe to get notifications on new blog posts!
Discover more from The Keeblog
Subscribe to get the latest posts sent to your email.